
The new updates of Windows 11 bring it to better performances and a easier management of hardware and system resources. The new system of search PID, publisher, user or process and App History FROM Task Manager, helps you see applications that have used many CPU resources and Internet band.
In App History You can see a top of applications that have done the most upload, download or Applications that have used the highest number of MB on mobile internet connections.
How to see applications that have used many CPU resources on Windows 11
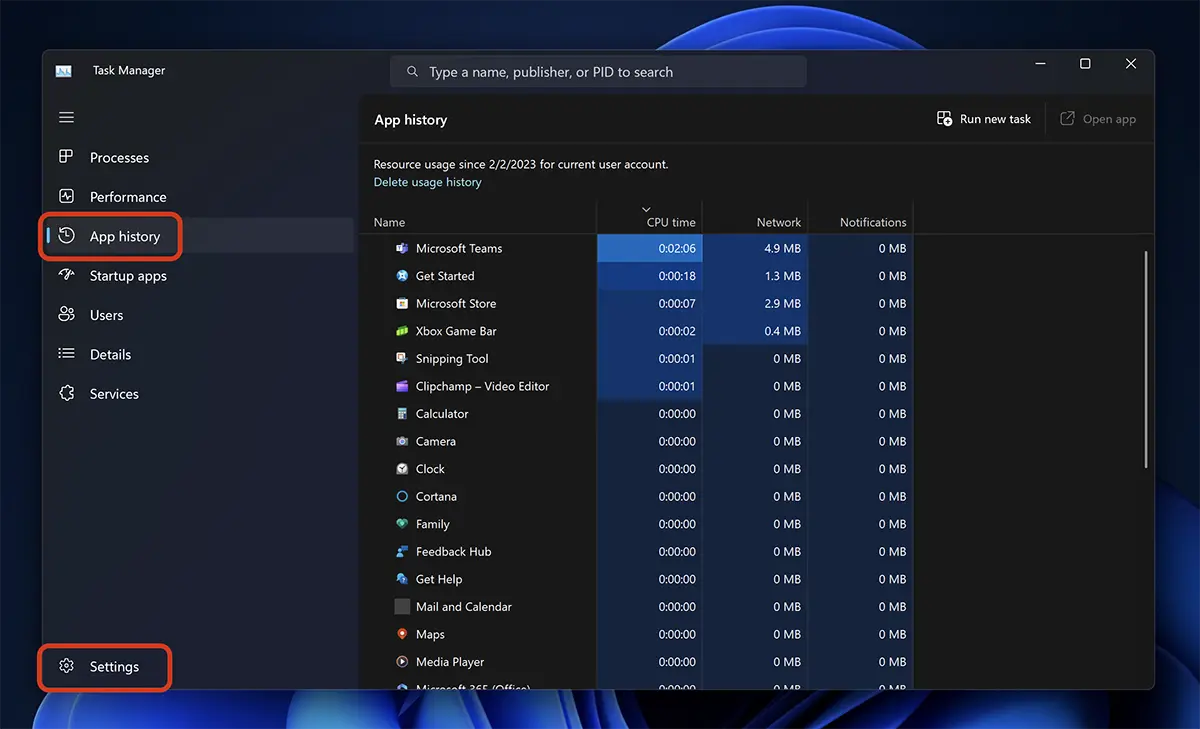
This is a history of using the CPU and Internet resources by the applications and processes that have run both the user and background. This history is in Task Manager → App History.
1. Right -click on the activity bar (Taskbar) then click on Task Manager.
2. On the left side, click on App History.
By Deafult here are the applications that are installed from the App Store and the processes of applications that come once Windows 11, but from the settings Task Manager You can bend to keep a history of all processes.
For a history of all applications that ran on Windows 11, click on settings on the bottom left.
3. In Task Manager settings “Show history for all processes“.
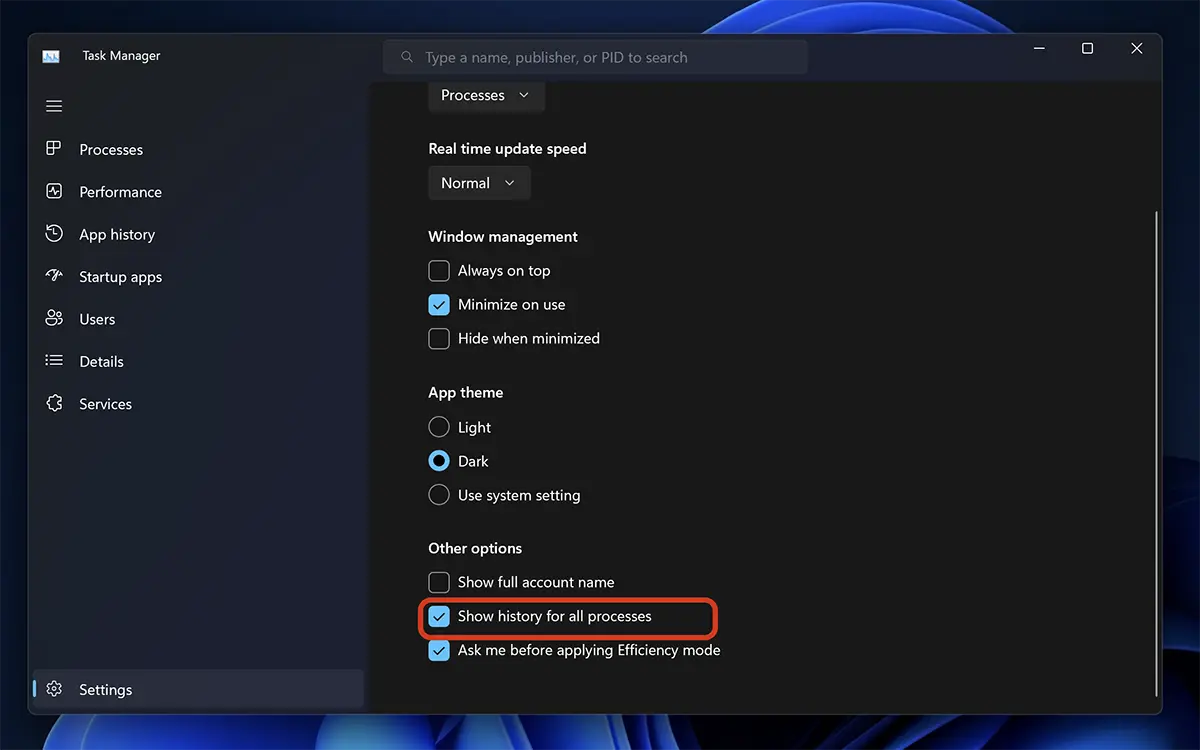
After this step, you return to the App History and you will see the list of all the processes that have run and run on Windows.
To see the statistics for “download” or “upload”, right click on the column and tick the options.
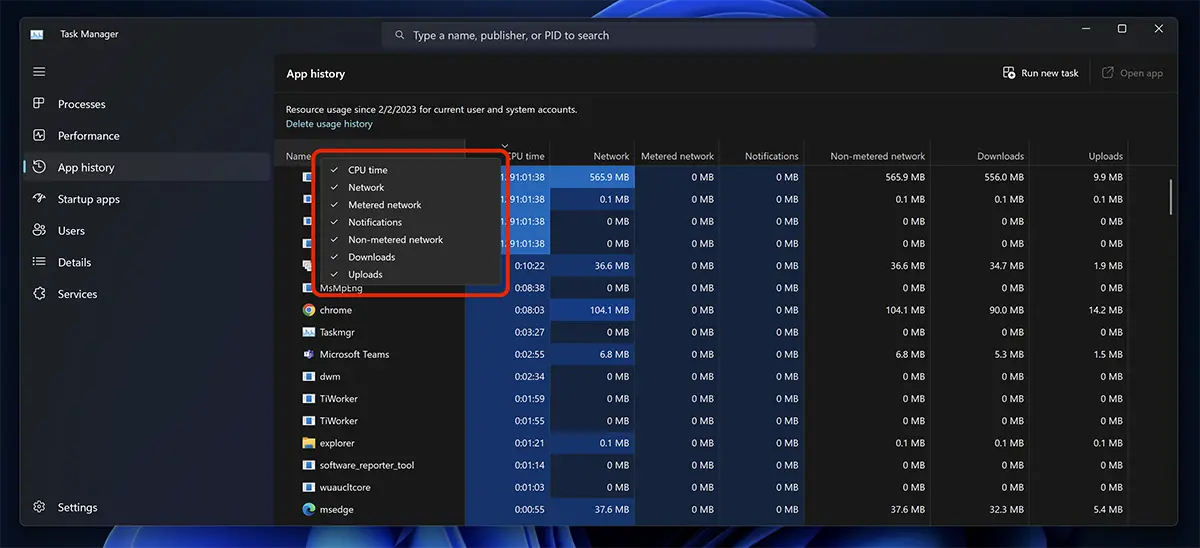
In this way you see the processes and applications that have used the most CPU and Internet resources on Windows 11.