We all know how quickly computer storage space can fill up, leading to decreased performance and difficulties in file management, especially if you have games, movies, or other large files taking up space. In this tutorial, you will see step by step how to free up disk space in Windows 11 without needing to delete important files.
Whether you have a laptop or a desktop, freeing up disk space is an important routine for maintaining optimal system performance. By optimizing storage space, you can eliminate unnecessary files, caches, temporary files, and other items that occupy space on your hard disk.
On Windows 11 operating systems, Microsoft has simplified the method for users to delete unnecessary files from the hard disk, while also providing advanced control over them.
Content
Methods to Free Up Disk Space in Windows 11
Freeing up disk space in Windows 11 involves identifying unnecessary files and removing them. To do this, you have several methods available: Storage Sense, Disk Cleanup, uninstalling unused applications, storing personal files on external hard drives or in cloud services.
Storage Sense
Storage Sense is a tool in Windows 11 that helps you free up disk space by automatically managing files. Storage Sense identifies temporary and unused files, such as generated thumbnails, temporary internet files, and files in the Recycle bin.
If you use OneDrive, Storage Sense can move files you haven't accessed recently to the cloud while still providing access to them through the OneDrive app.
To activate Storage Sense on Windows 11, follow these steps:
1. Open the Start menu, then open "Settings" and go to: System > Storage.
2. Turn on the Storage Sense toggle switch.
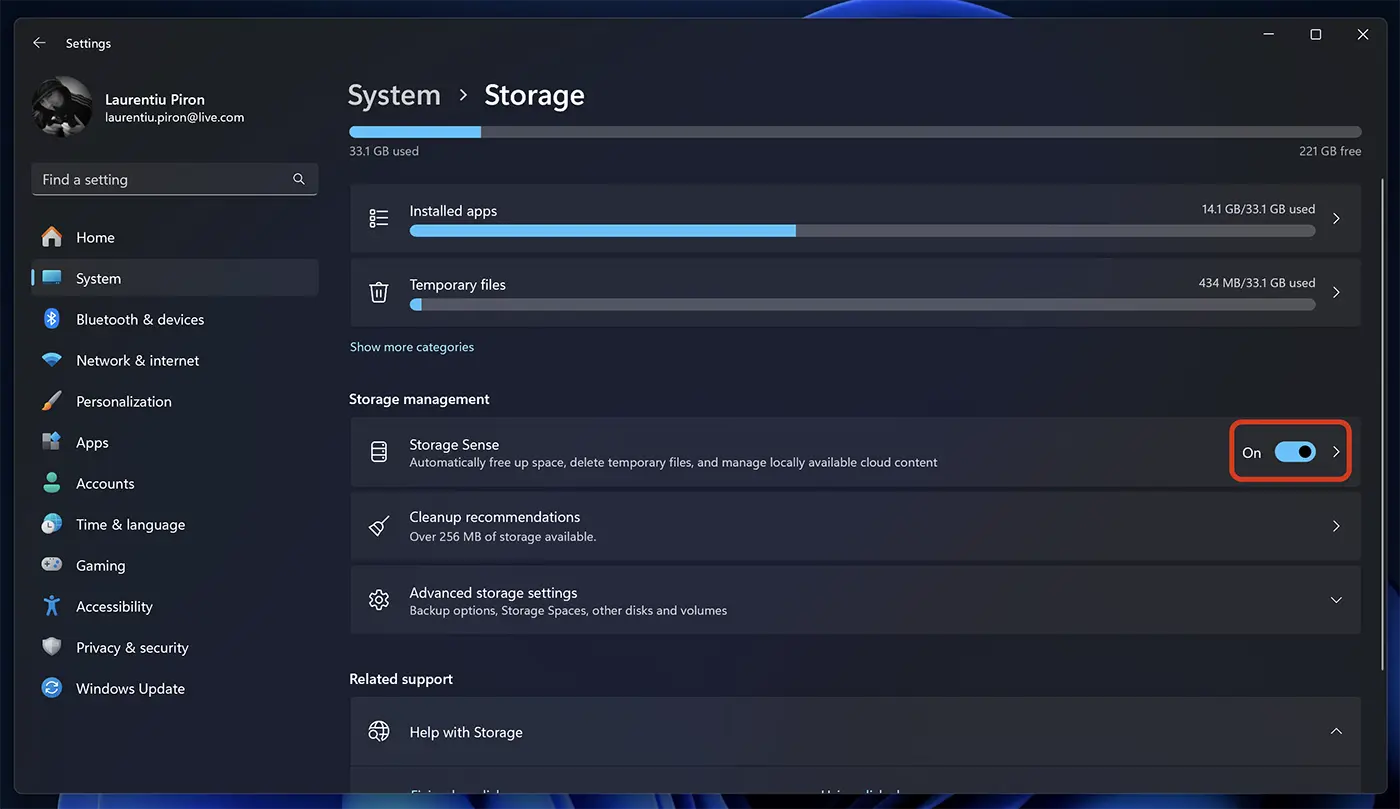
After activating Storage Sense, you can automate and customize how this feature manages unnecessary files on the hard disk.
You can set Storage Sense to automatically delete temporary files and unnecessary files created by some applications, automatically delete files from the recycle bin or the "Downloads" folder after a certain number of days. Also, if you use OneDrive, Storage Sense can be set to automatically move files to the cloud that haven't been accessed for a certain number of days. Files will be downloaded automatically when accessed through a shortcut that remains stored locally.
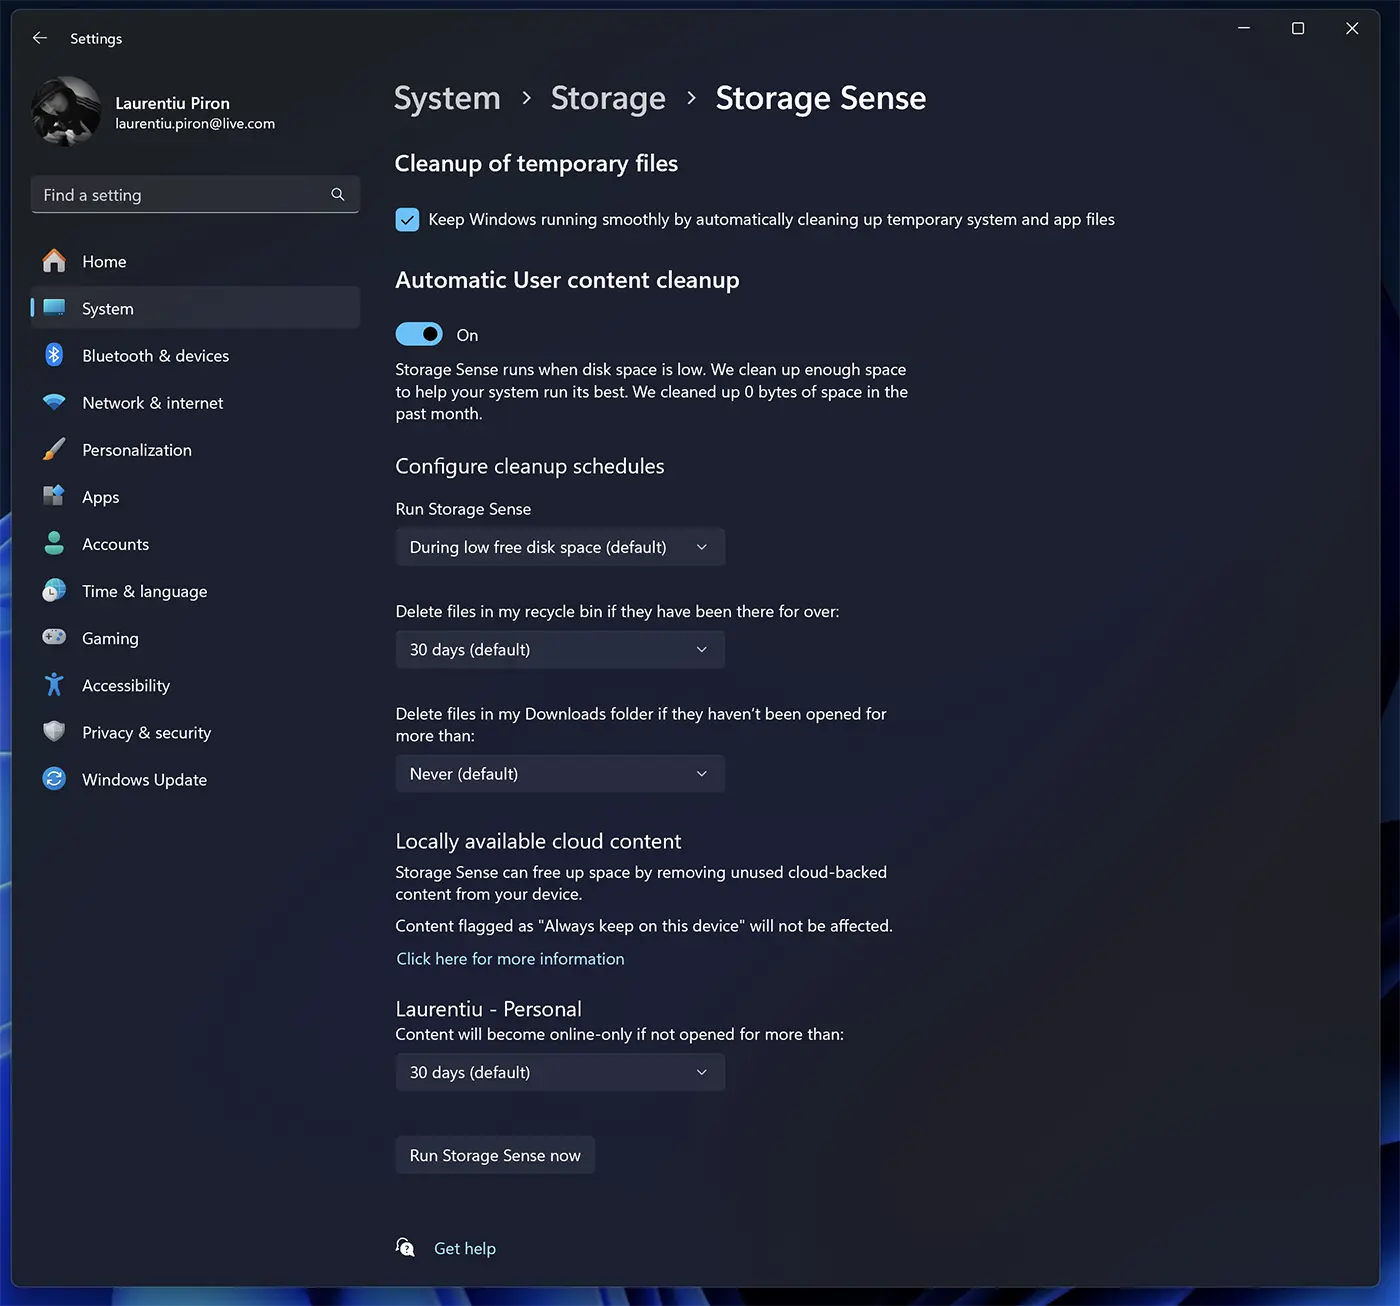
Disk Cleanup: An Efficient Method to Free Up Disk Space in Windows 11
Disk Cleanup is a tool in Windows 11 that allows you to manually identify and remove unnecessary files from a specific disk drive. Unlike Storage Sense, which works automatically, Disk Cleanup offers more control over the types of files you can delete from storage space (hard disk).
Here's how Disk Cleanup works in Windows 11:
Identify unnecessary files: Scan the selected drive and identify temporary files, internet files, files in the recycle bin, and other types of files that can be safely deleted.
Provide control over deletion: Manually select the types of files you want to delete from the list provided by Disk Cleanup. Each file type is accompanied by an estimate of the disk space you will recover by deleting it.
Delete selected files: After selecting the files you want to delete, confirm your choice, and Disk Cleanup will permanently delete them.
To use Disk Cleanup in Windows 11, open the Start menu, then go to: System > Storage > Cleanup recommendations.
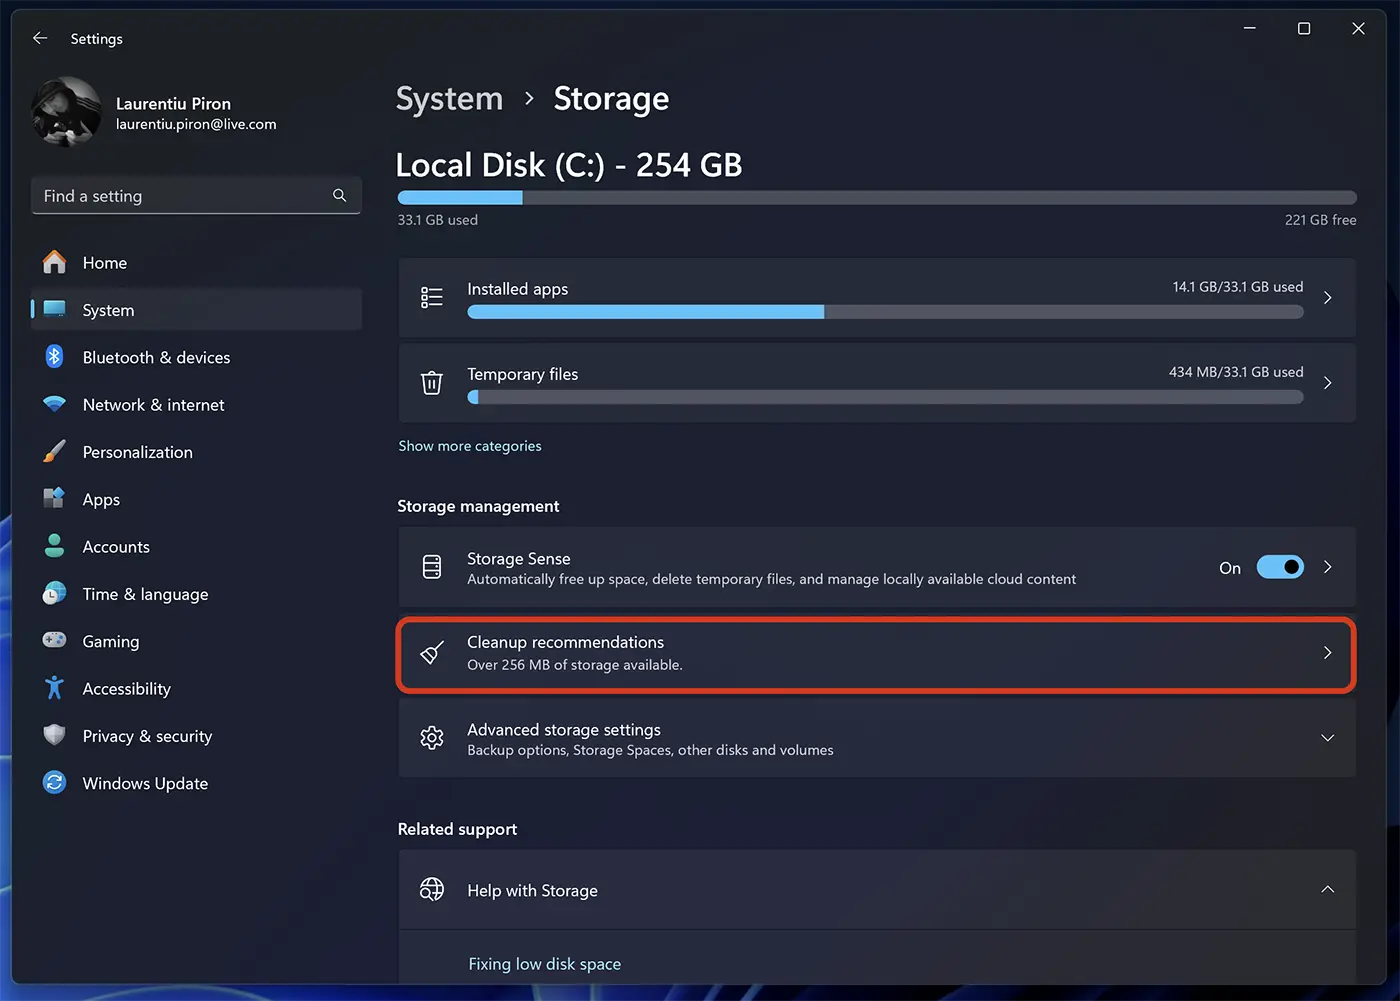
In "Cleanup recommendations," you have options to free up disk space by deleting temporary files and files where Windows diagnostic data is stored (used in "Diagnostic Data Viewer").
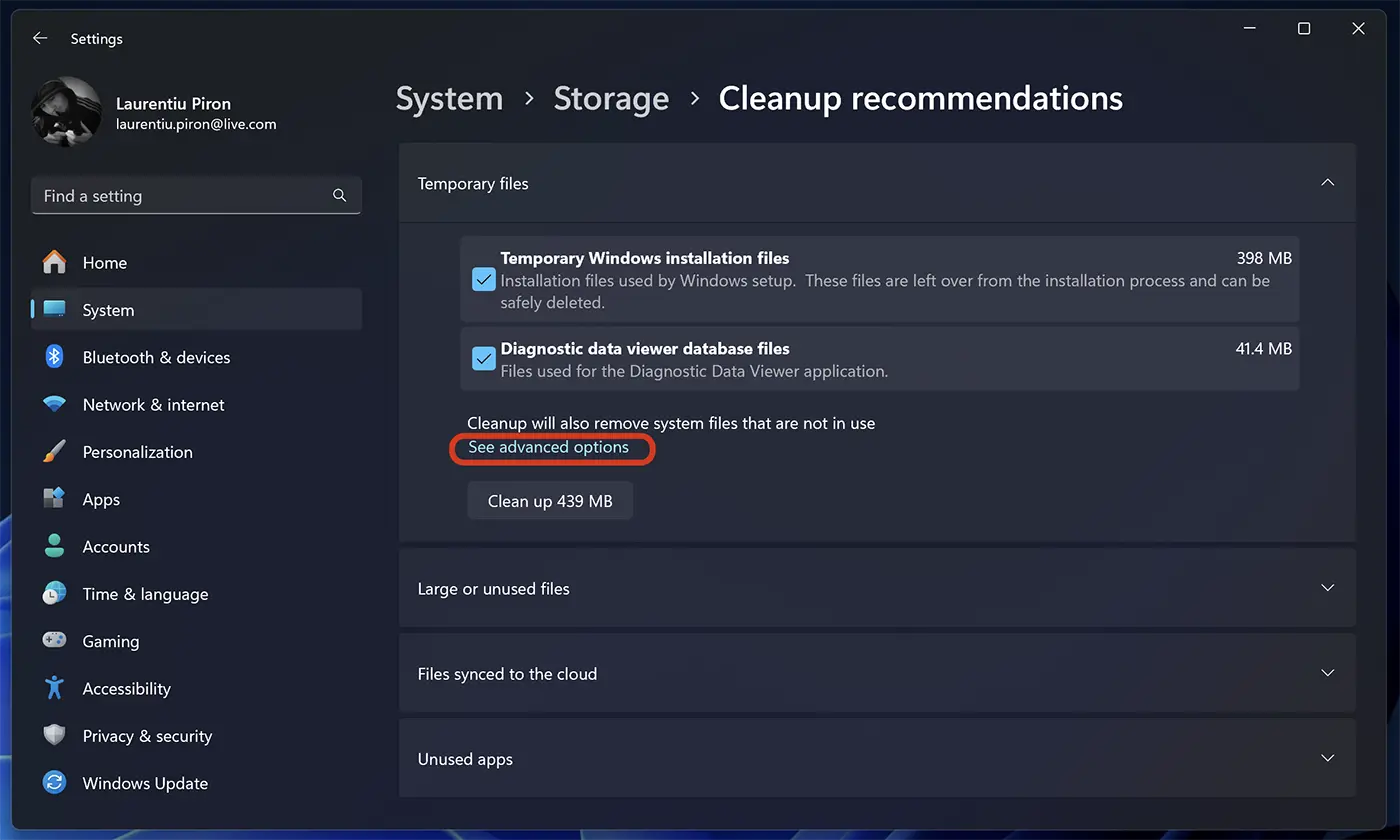
Additionally, you can click on advanced options to choose the type of temporary files you want to delete from the hard disk.
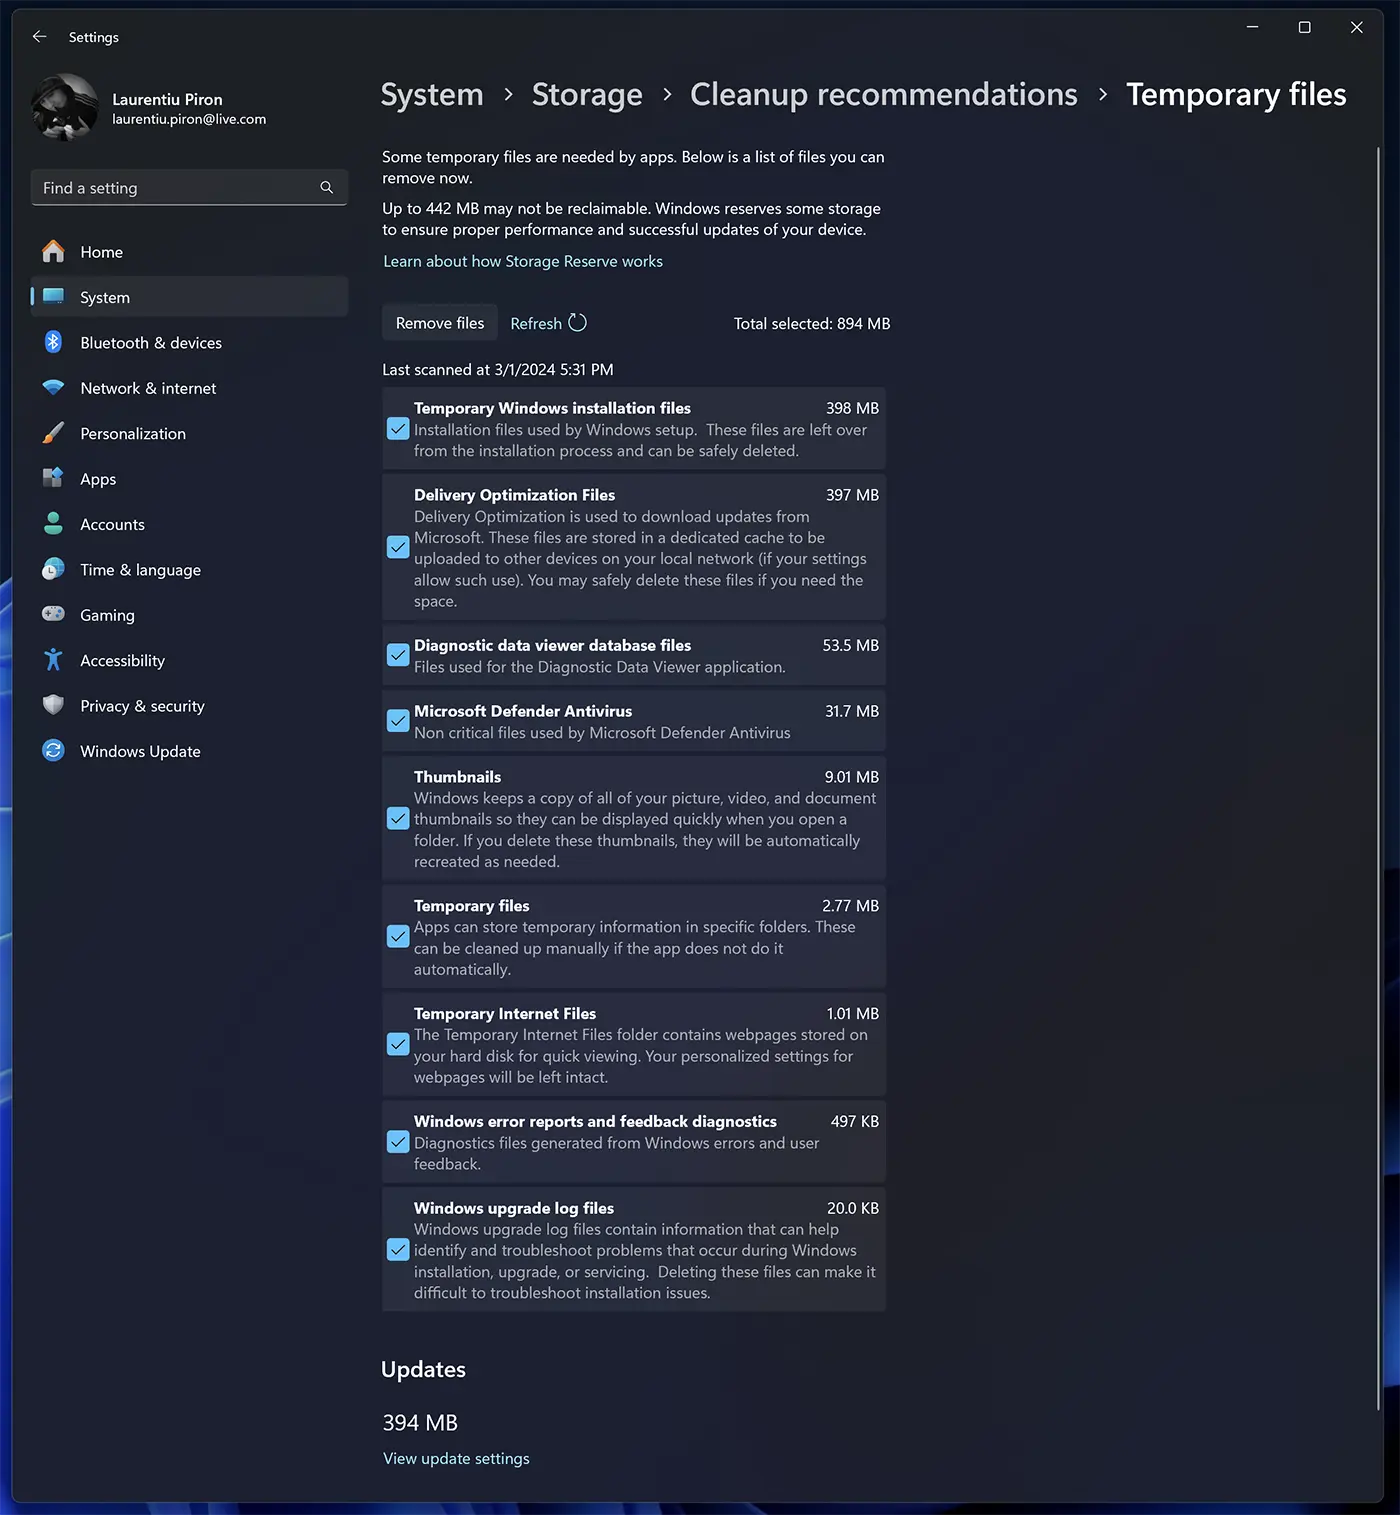
Once you've decided on the type of temporary files you want to delete, click the "Remove files" button, then confirm that you want to delete these files from the hard disk.
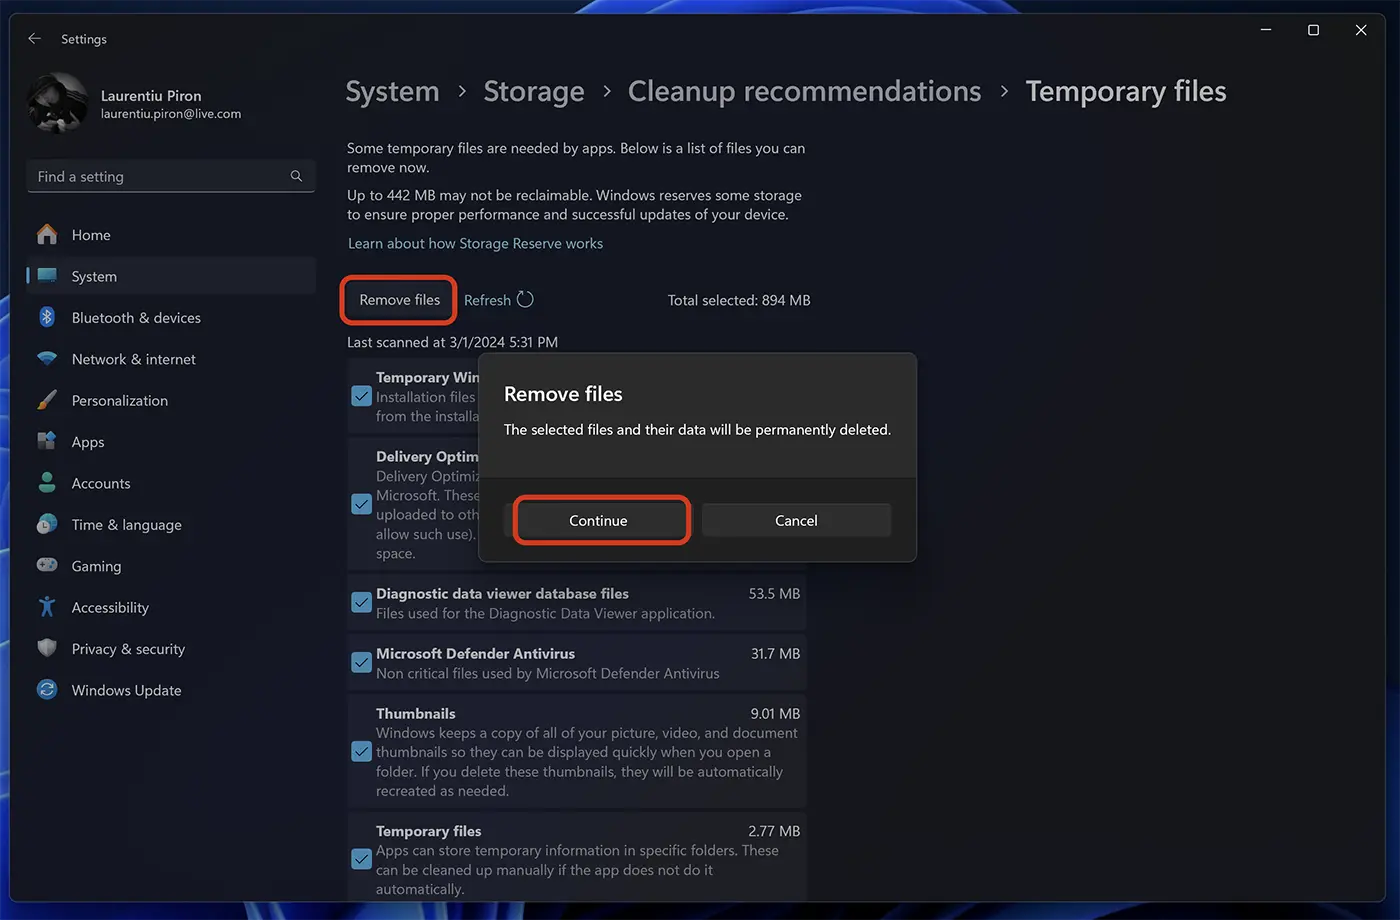
This way, you can free up disk space with Disk Cleanup on Windows 11.
Uninstall Unused Applications
We are often tempted to install many applications, but it often happens that we never open some of them again after the first use and forget about them. Each installed application occupies space on the computer's storage, so to free up disk space, it is good to uninstall applications that you no longer use.
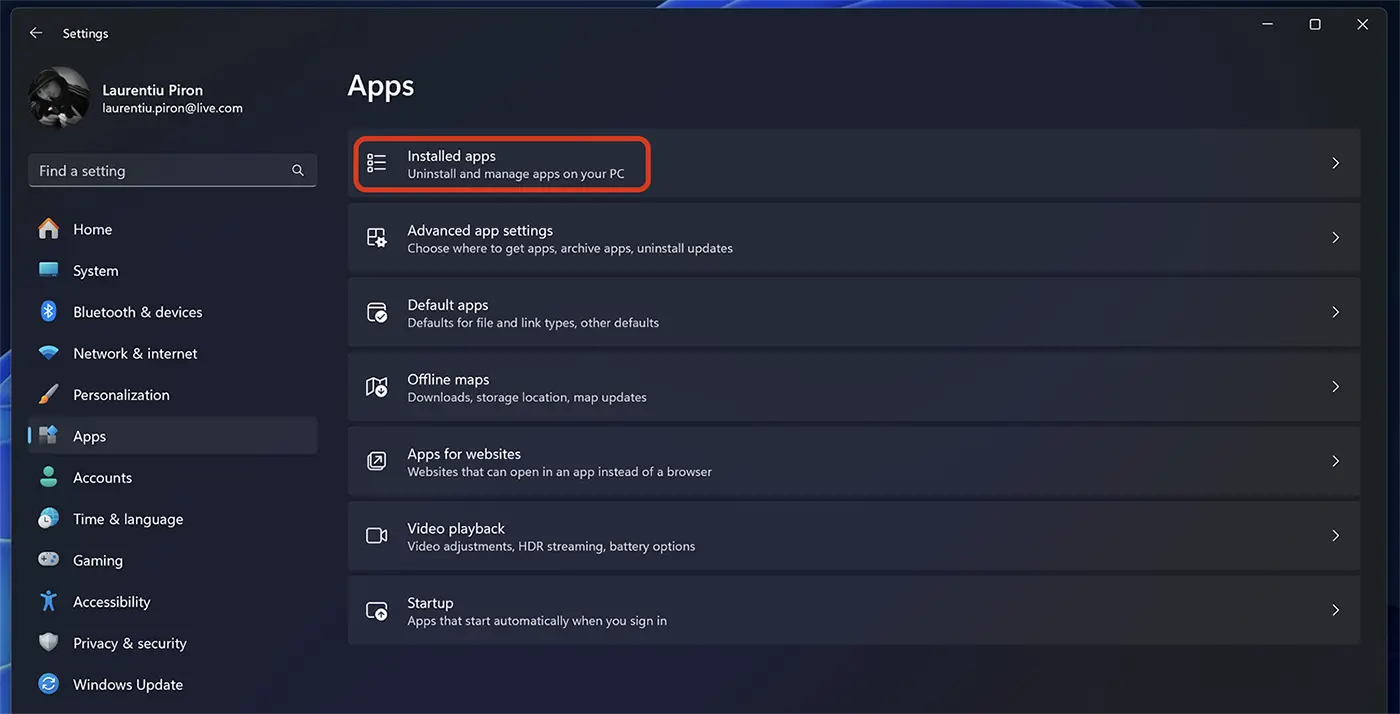
Uninstalling applications on Windows XNUMX is very easy from the menu: Start > Settings > Apps > Installed Apps.
Go to the application you want to uninstall, then click on the menu with the three dots and click "Uninstall".
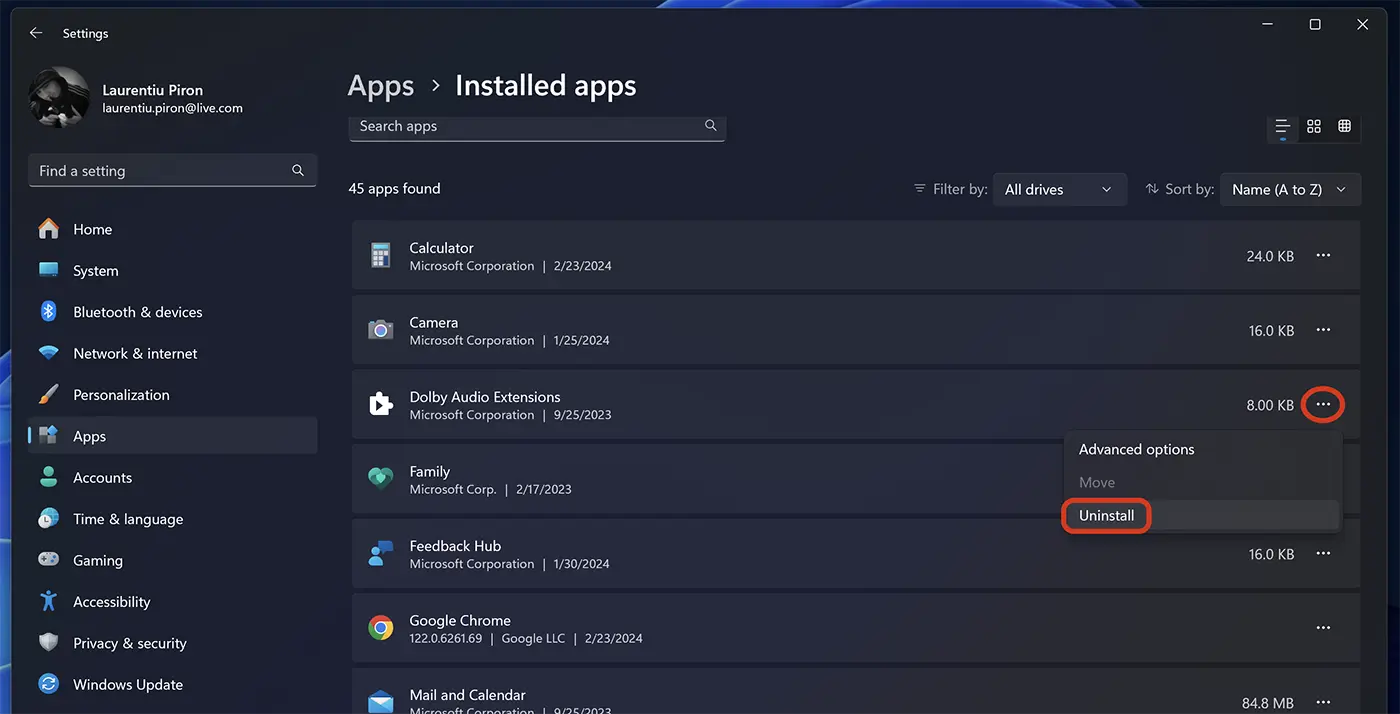
This way, you can manually uninstall applications you don't use anymore. However, there are also native system applications that cannot be uninstalled, but they occupy an insignificant percentage of storage space.
Related: How to uninstall and reinstall Microsoft Store on Windows 11
Additionally, you can manually or automatically transfer personal files to external storage spaces or cloud storage services.