This step-by-step tutorial demonstrates how to uninstall and reinstall Microsoft Store on a Windows 11 computer, utilizing command lines in Windows PowerShell.
Uninstalling and reinstalling the Microsoft Store app is a useful method when encountering errors during the installation or update of applications through this platform.
How to uninstall and reinstall Microsoft Store on Windows 11
You need to execute two command lines in Windows PowerShell: one for uninstalling Microsoft Store and another for reinstalling it.
1. Open the utility Windows PowerShell with privileges Administrator. Write "Terminal" in the "Start", then right click on the utility "Terminal", Click"Run as administrator".
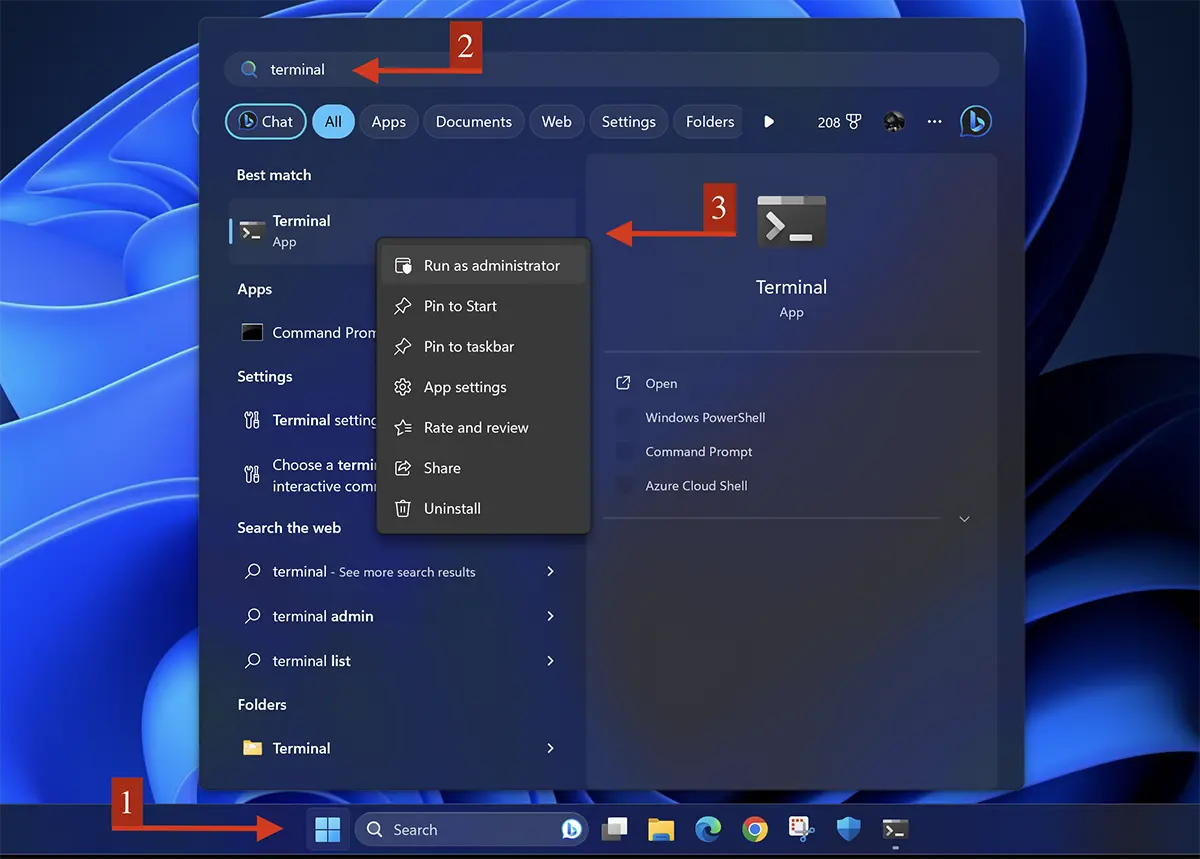
2. Click "Yes" in UAC to confirm opening Windows PowerShell.
3. Run the command line below:
Get-AppxPackage -allusers *WindowsStore* | Remove-AppxPackageThis line will uninstall Microsoft Store after pressing the "Enter".
4. Reinstall Microsoft Store by running the command line below:
Get-AppxPackage -allusers *WindowsStore* | Foreach {Add-AppxPackage -DisableDevelopmentMode -Register “$($_.InstallLocation)\AppXManifest.xml”}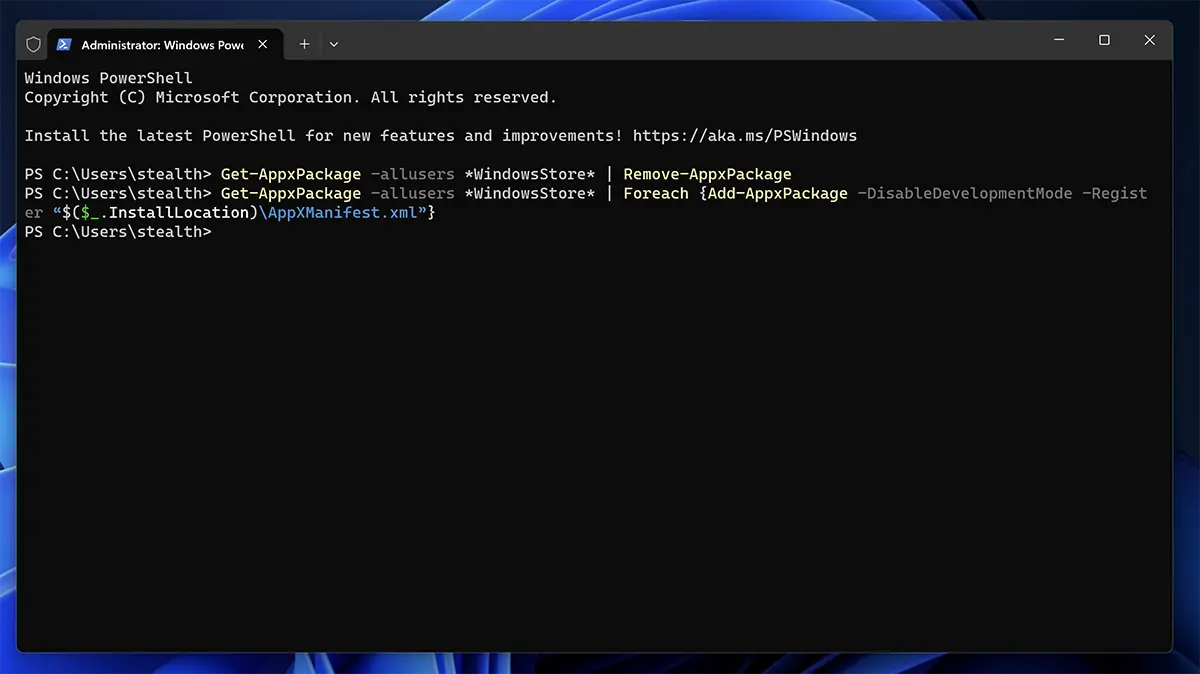
Wait for the installation process to complete, then close Windows PowerShell.
After restarting your computer, you should no longer get any errors when you try to install or update apps from Microsoft Store.